
Sunday, March 27, 2011
Saturday, March 26, 2011
oh dear, winter's back
Weatherman says it's gonna be cold this weekend. I'm not terribly worried except for the peppers that I've planted just a bit early. Peppers really like it hot. Since it's going to be a few more days of questionable temperatures, I've decided to build a little shelter for the peppers. For supplies, I've got some clear plastic sheeting and a wire plant support. I'm going to wrap the sheeting around the plant support and stake it like a mini greenhouse over the peppers. This should be good for a few days until it warms up again.
 |
| construction |
 |
| snug as a bug |
Friday, March 25, 2011
checking in
Here's a quick look through the garden to see how all the little residents are doing after last night's cold spell. Looks like everyone is no worse for wear and some are even thriving :)
These tiny carrot sprouts are the very same ones I had given up hope of ever seeing. It looks like they're going to be competing with the buttercrunch lettuce I interplanted after all.
I was worried about the soggy soil in my potato bucket, but these guys seem to be thriving.
The nursery spinach is going to give a nice little head start to the seeds starting to creep up behind them... it's about time to plant the next section of the row.
 |
| the first little strawberry flowers of spring :) |
 | ||||
| can you see me? |
These tiny carrot sprouts are the very same ones I had given up hope of ever seeing. It looks like they're going to be competing with the buttercrunch lettuce I interplanted after all.
 |
| red potato |
 |
| spinach |
The nursery spinach is going to give a nice little head start to the seeds starting to creep up behind them... it's about time to plant the next section of the row.
Thursday, March 24, 2011
eeek! frost warning
I've had a pretty good gut feeling that we wouldn't have any more frosts this year, but we now have an official frost advisory for 4am tomorrow morning. Yikes! My only concern is my poor little pepper plants that I planted too early. Unfortunately, it is too late to drive all the way to Matthew's house on a rescue mission. Therefore, I will sit back and hope for the best. I guess if it's that bad we'll just have to get some new peppers.
Wednesday, March 23, 2011
I think we've sprung a leak!
I haven't been to Matthew's to inspect my garden for a few days so I just took a late night survey. Either I have planted some seriously thirsty seeds, or two of my whiskey barrels have sprung leaks. I had to do a little patch work on the drainage holes I had previously drilled and it looks like it wasn't quite up to par. I'll have to make a closer inspection this weekend (in the daylight!).
On the bright side, my spinach and lettuce both had a few sprouts and my potatoes are coming up nicely. Can't wait for everything else to start peeking out over the next week or so!
On the bright side, my spinach and lettuce both had a few sprouts and my potatoes are coming up nicely. Can't wait for everything else to start peeking out over the next week or so!
Sunday, March 20, 2011
First Day of Spring :)
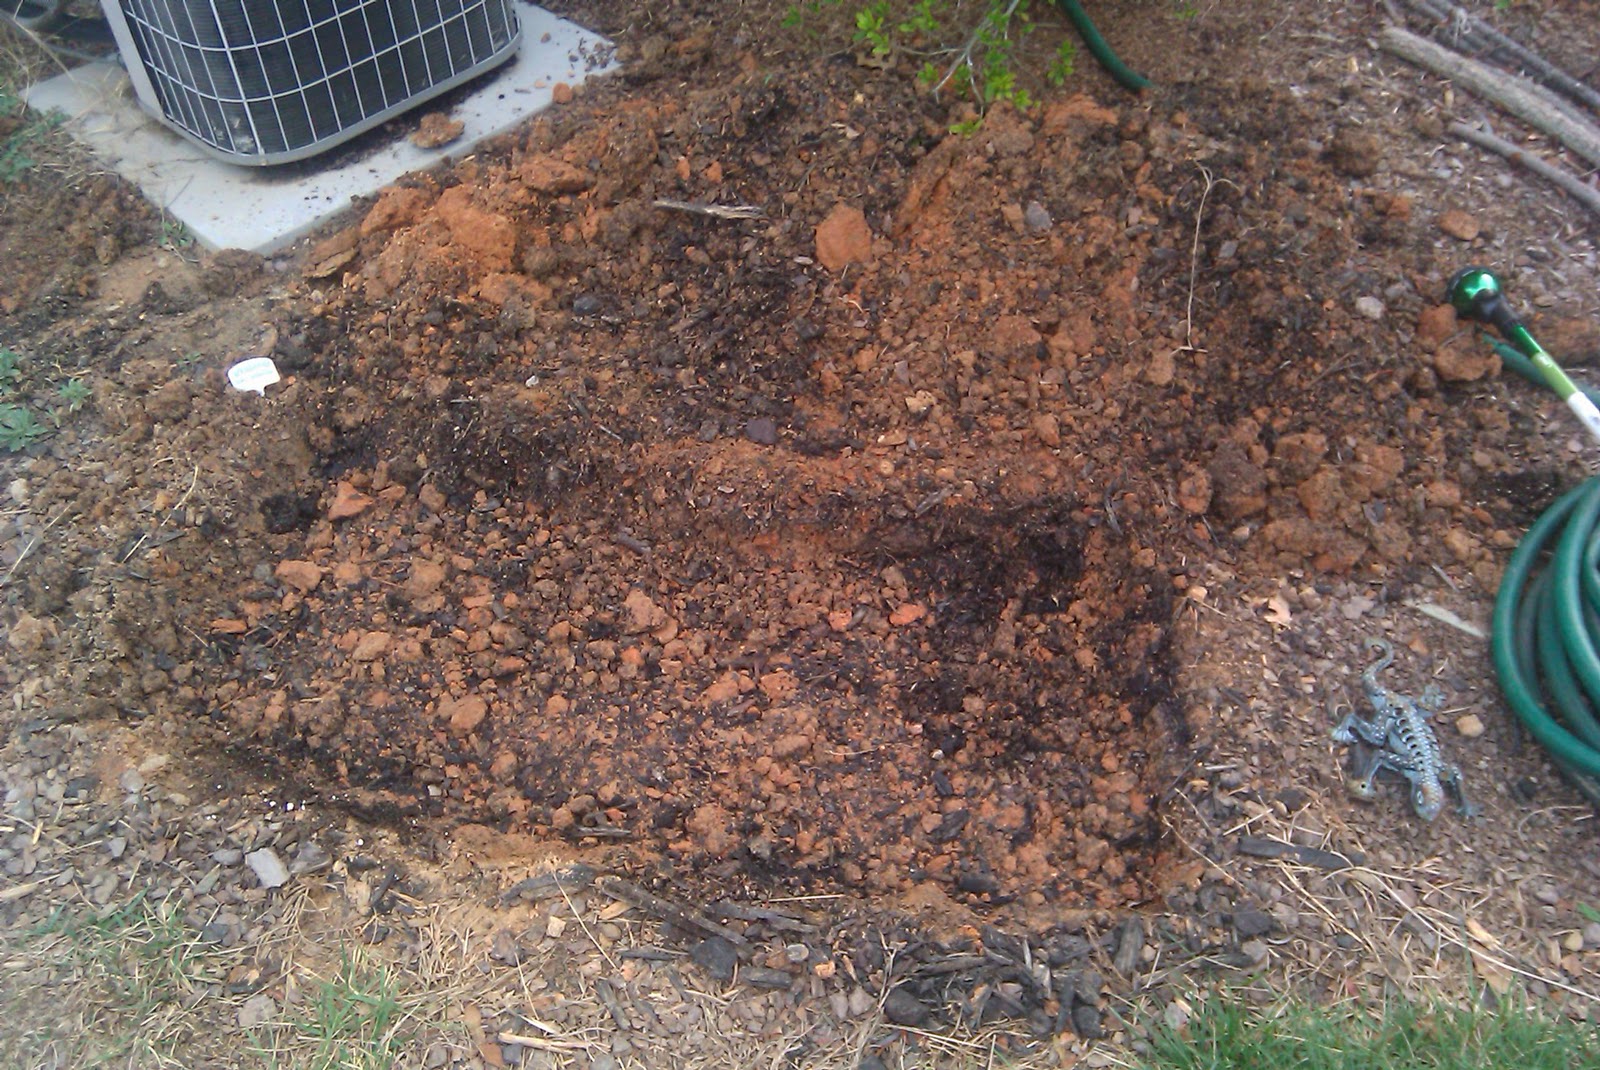
Hopefully the first day of spring will be the hardest day of work in my garden this year! I tried to get all of the heavy lifting out of the way, from here on out it should be all the fun stuff. Carolina red clay is so hard to work... the only reason I even tried is because the peppers did so well directly in the ground that I didn't want to move them out.
 |
| starting the day off with a little "light" tilling |
I also got the rest of my containers prepped and filled. I now have 4 whiskey barrels and 2 potato buckets with self-watering reservoirs. However, I still have 6 more seed potatoes without a home. I think I can get one more potato bucket in the back, we'll see. I also haven't found the right place for the onions and shallots just yet. I've been dealing in very deep containers so far but onions don't necessarily need the same space. Finally, I'm still on the lookout for another strawberry pot for my herb garden. I just heard about the new Carolina Pottery that opened in Cary so maybe I'll get lucky and find just the right things there.
 |
| danger! construction zone! |
Matthew was so sweet to help me out with my construction projects today. I would have been there all day cutting, snipping, and sawing. Two of the barrels are destined to be home to a zucchini and a summer squash. I will pair them with some lettuce until the squash are ready to take over. I haven't made the final decision on the last barrel just yet. Maybe I'll see something new to try at the nursery.
I put a few peppers in today, but it really is a bit too early. We have potential for some light frosts in the next week or so. If it's going to be a really cold night, I'll just put a bucket or something over them and hope for the best. The rest of my pepper plants are scheduled to arrive after all danger of frost has passed. I also put a few broccoli seeds in next to the peppers just to see what happens. If I don't have any luck with the seeds, I'll put some plants in later this spring.
 |
| Hot Banana! Sweet Banana! |
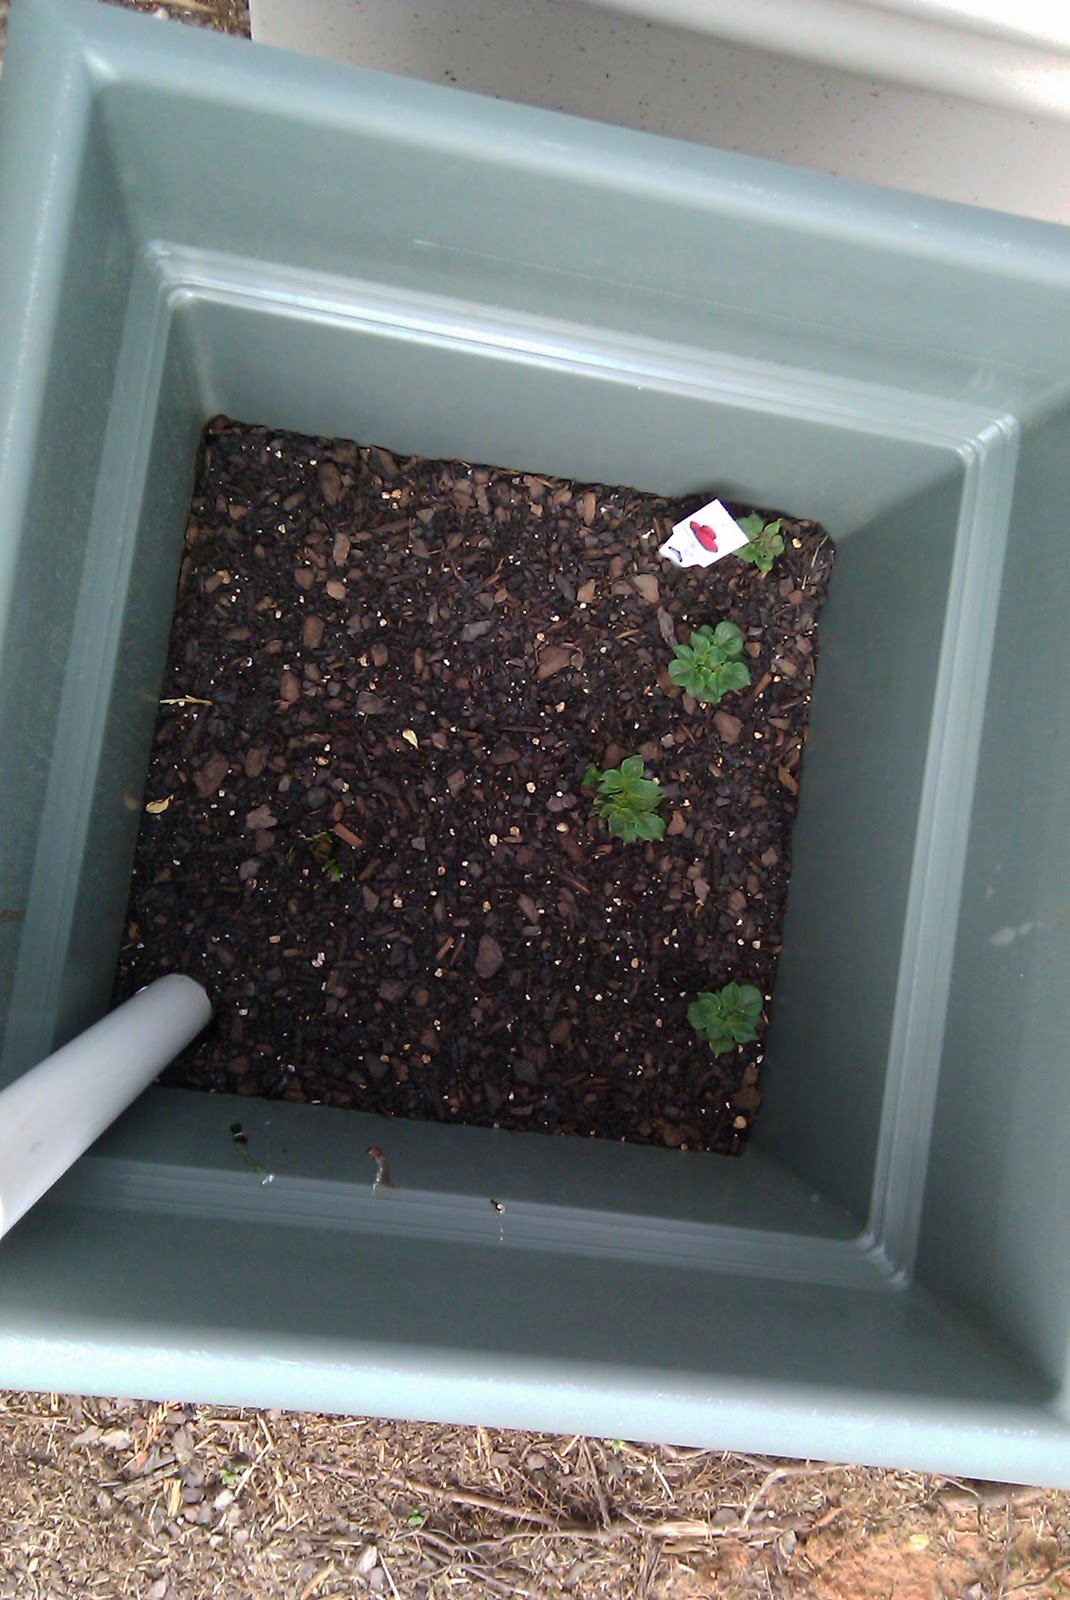
I bought this asparagus on a whim at Lowes. I wasn't really planning to add asparagus this year but it seemed like a good idea. Matthew and I both love asparagus so why not get it fresh from the back yard? Asparagus plants can last 15-20 years so I hope I picked a good spot!
 |
| asparagus bed |
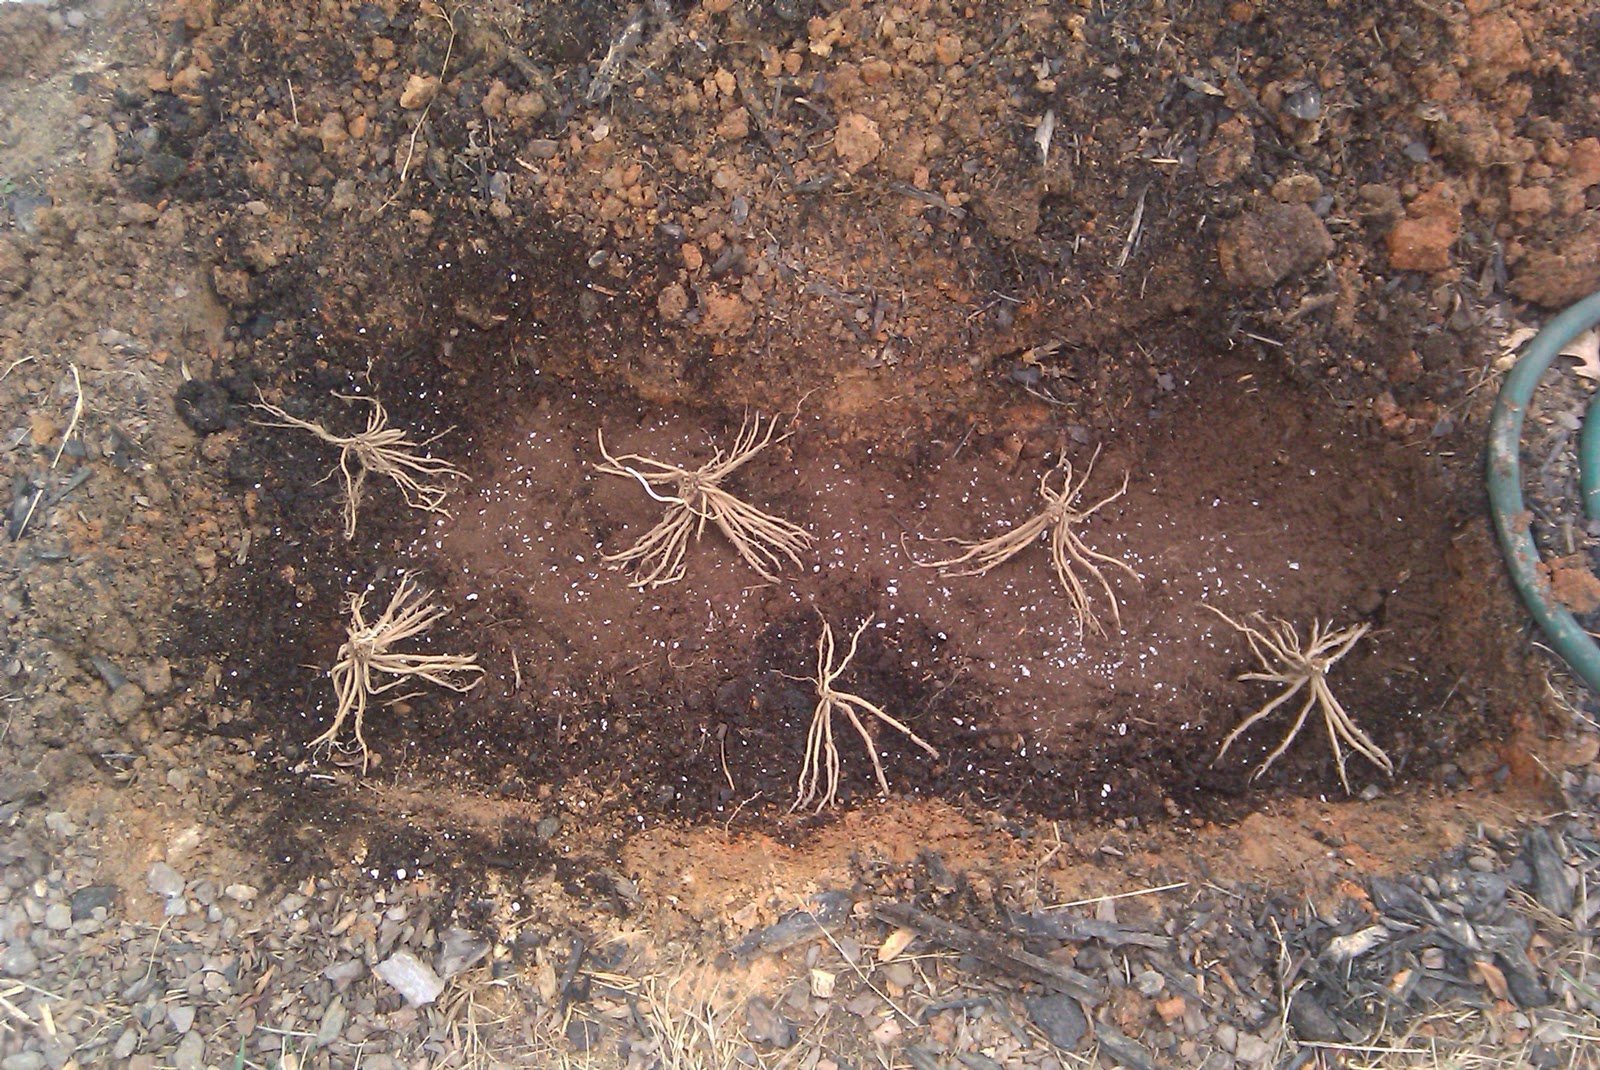 |
| asparagus crowns, look like spiders! |
After a long, hard day in the garden it was nice to look back and admire everything we accomplished. Now all that's left is to keep planting, hope for the best, and harvest the fruits of our labors =) |
| carrots, potatoes, green beans, cucumbers, lettuce, nasturtium, peppers, broccoli lookin' good |
 |
| spinach, carrots, lettuce, nasturtium, chinese cabbage |
Saturday, March 19, 2011
Spring Update
The potatoes are starting to peak out of the soil. I'm worried that the soil seems to be staying quite soggy. I'll be keeping my eye on it, I don't want the potatoes to rot.
Still waiting for the carrots in the barrel to sprout but in the meantime it seems like the carrots I'd given up on in the side raised bed decided to come up. Good thing I only planted over with lettuce!!
I picked up a couple of supplementary plants at Lowe's. This should give me a jump start on the spinach harvest. We're also going to try a new pepper this year, hot banana. It's a bit too early to put them in the ground so I'll probably have to pot them for a while first.
Big day tomorrow:
- Finish converting 3 more whiskey barrels
- Construct and plant potatoe bucket #2
- Till and supplement the back garden plot
- Figure out where to put the onions and shallots
Monday, March 14, 2011
Whiskey Barrel 'O Carrots
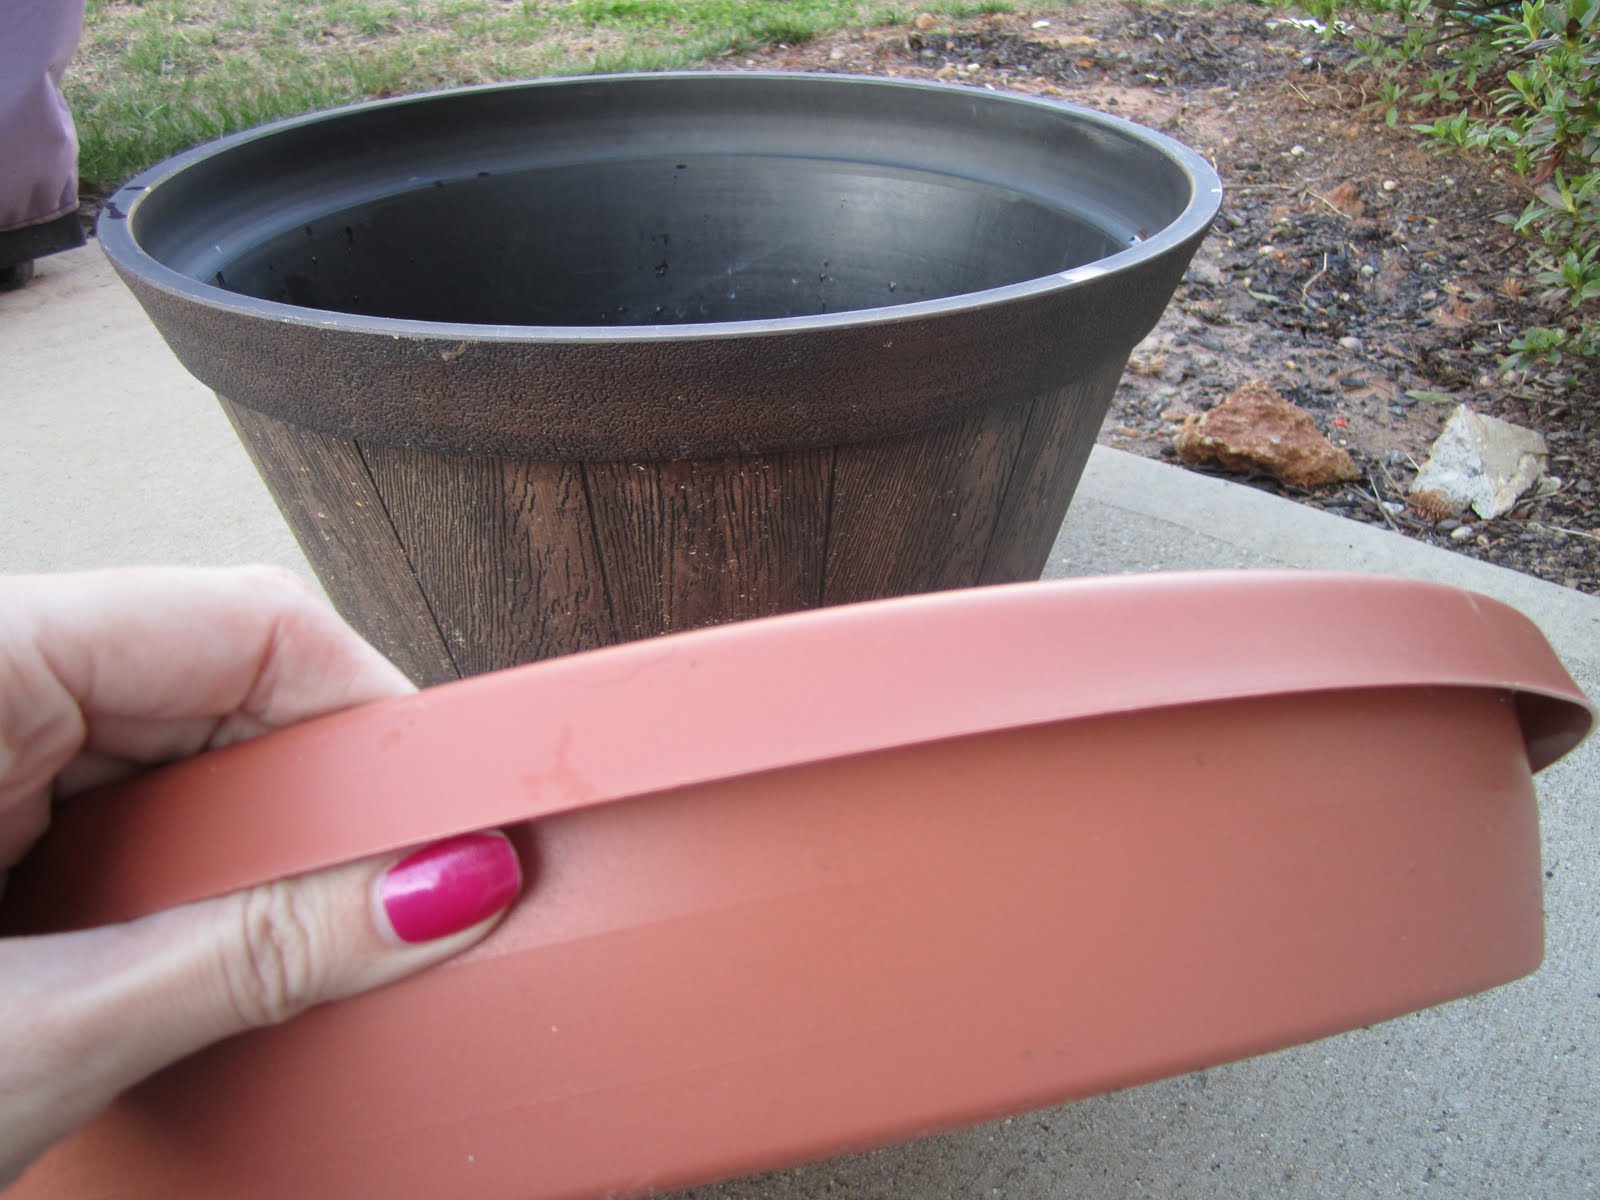
My second container design was not so easy. I have several decorative "whiskey barrels" that are actually made of some kind of plastic material. Since they are pretty and much more expensive, I didn't want to stack them up to make a reservoir. So after much searching for an appropriate material to make my false bottom out of, I finally found some plastic trays at Home Depot that I was able to make work.
Unfortunately, I could not get the exact size I needed in order to make a 2 gallon reservoir and leave enough room for the plants to actually grow. So, I had to cut down the tray so that it would sit lower in the barrel. BTW - this was after my 4th or 5th trip to some sort of home improvement store! Next time I need a better plan!
The rest is really the same as the previous model. A fat pipe for the wick and a skinny pipe for the watering port. Looking back, I think some holes in the watering pipe could be a good idea. It would allow some of the water directly into the soil and the bottom would fill faster. I'll have to try it and see.
I planted a small variety of carrots, called Touchon, so that they won't grow too deep for the container. Carrots must be direct sown wherever you plan to grow them otherwise they'll be crooked. I started with a small planting around the center. I'll plant more seeds closer and closer to the outside every 2-3 weeks so I can have a continuous harvest later.
 |
| false bottom, a little too large for the barrel |
Unfortunately, I could not get the exact size I needed in order to make a 2 gallon reservoir and leave enough room for the plants to actually grow. So, I had to cut down the tray so that it would sit lower in the barrel. BTW - this was after my 4th or 5th trip to some sort of home improvement store! Next time I need a better plan!
 |
| cutting down to size(-ish) |
The rest is really the same as the previous model. A fat pipe for the wick and a skinny pipe for the watering port. Looking back, I think some holes in the watering pipe could be a good idea. It would allow some of the water directly into the soil and the bottom would fill faster. I'll have to try it and see.
 |
| ready to go |
 |
| ready for container mix |
I planted a small variety of carrots, called Touchon, so that they won't grow too deep for the container. Carrots must be direct sown wherever you plan to grow them otherwise they'll be crooked. I started with a small planting around the center. I'll plant more seeds closer and closer to the outside every 2-3 weeks so I can have a continuous harvest later.
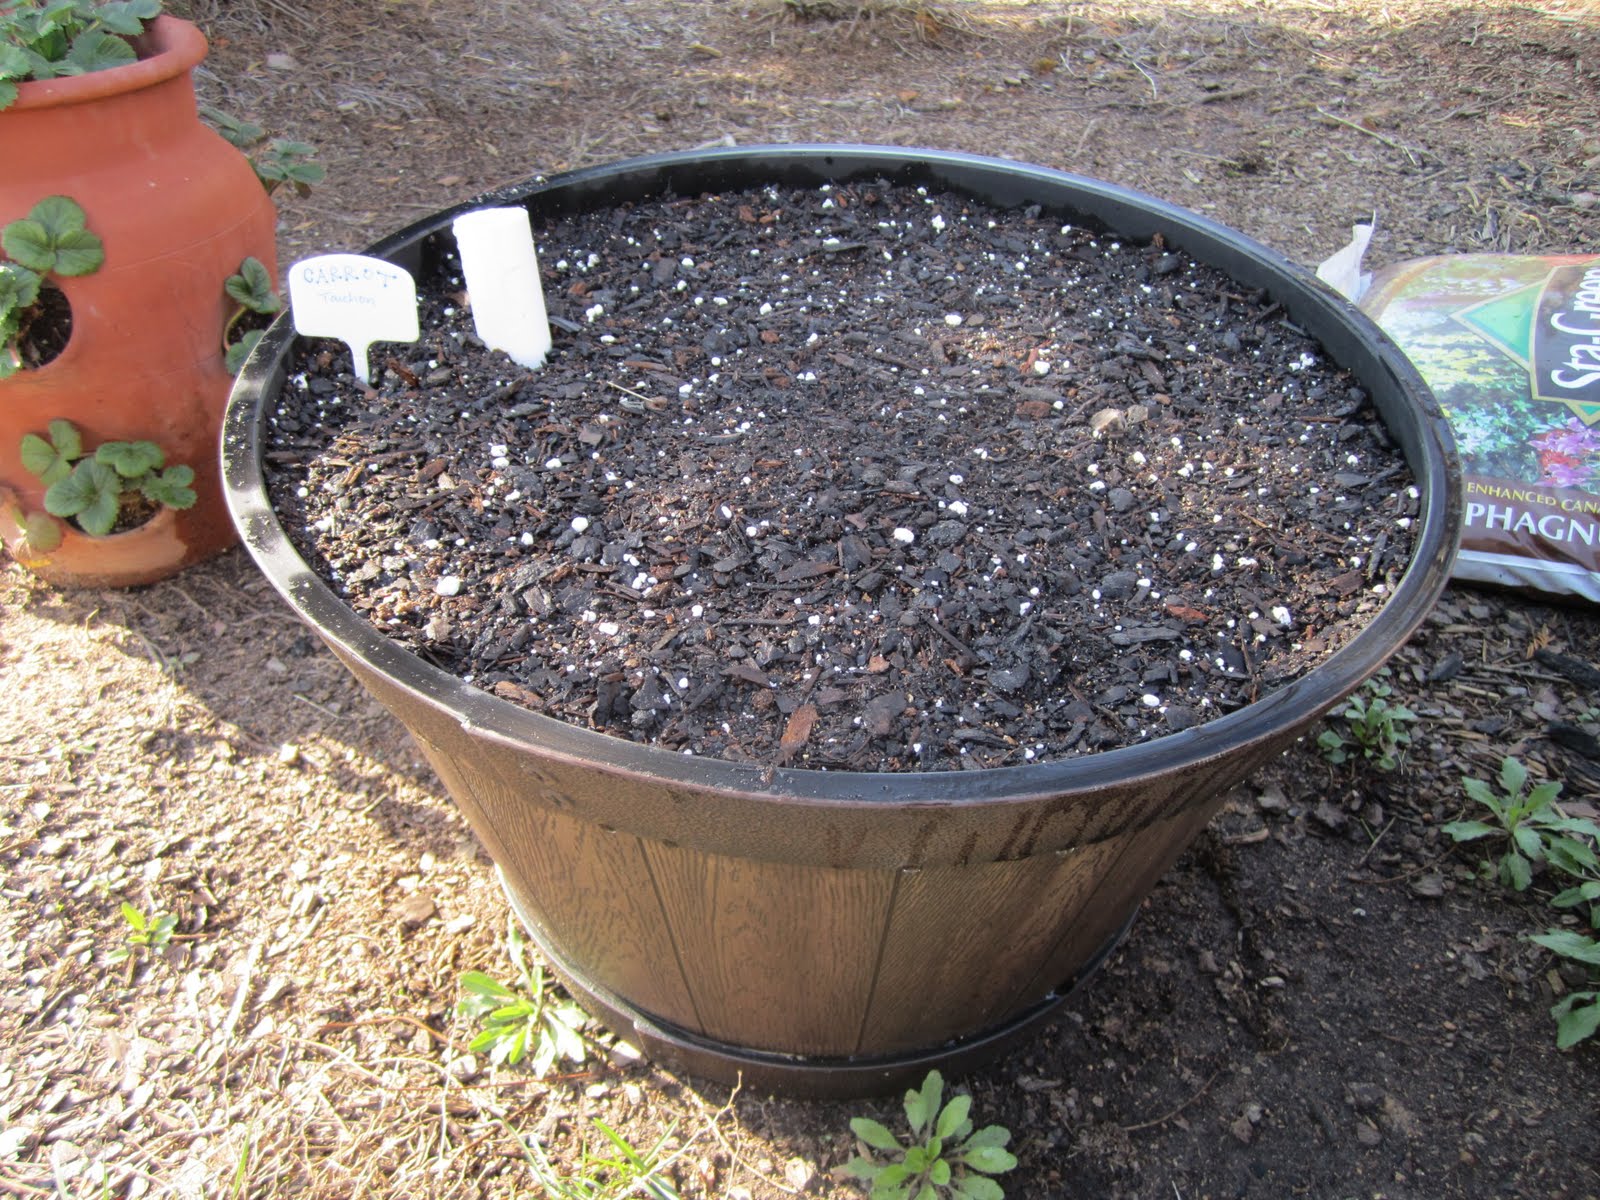 |
| Ok, carrots... good luck! |
Sunday, March 13, 2011
What's in my containers?
In addition to new methods, I've also beefed up my soil strategy this year. I started with Miracle Gro Organic Garden Soil and added a few things to make it a little better.
For a container, I know that I need the soil to hold more water than you would expect in an earth garden. To do this, I've added Peat Moss, Vermiculite, and Perlite. This will be a slightly acidic mixture.
My little veggies also need food in order to grow big and yummy for my kitchen. So, I've just beefed up the garden soil with a little organic compost. This is a cow's manure compost from Lowe's.
The end result is this wonderful mixture where the perlite is obvious and it's a really rich dark brown. The sunlight makes it look a little lighter than it actually is. I'll use this same mix for all my acid-loving friends (like spinach!!) but I'll add some lime to balance it out for other uses.
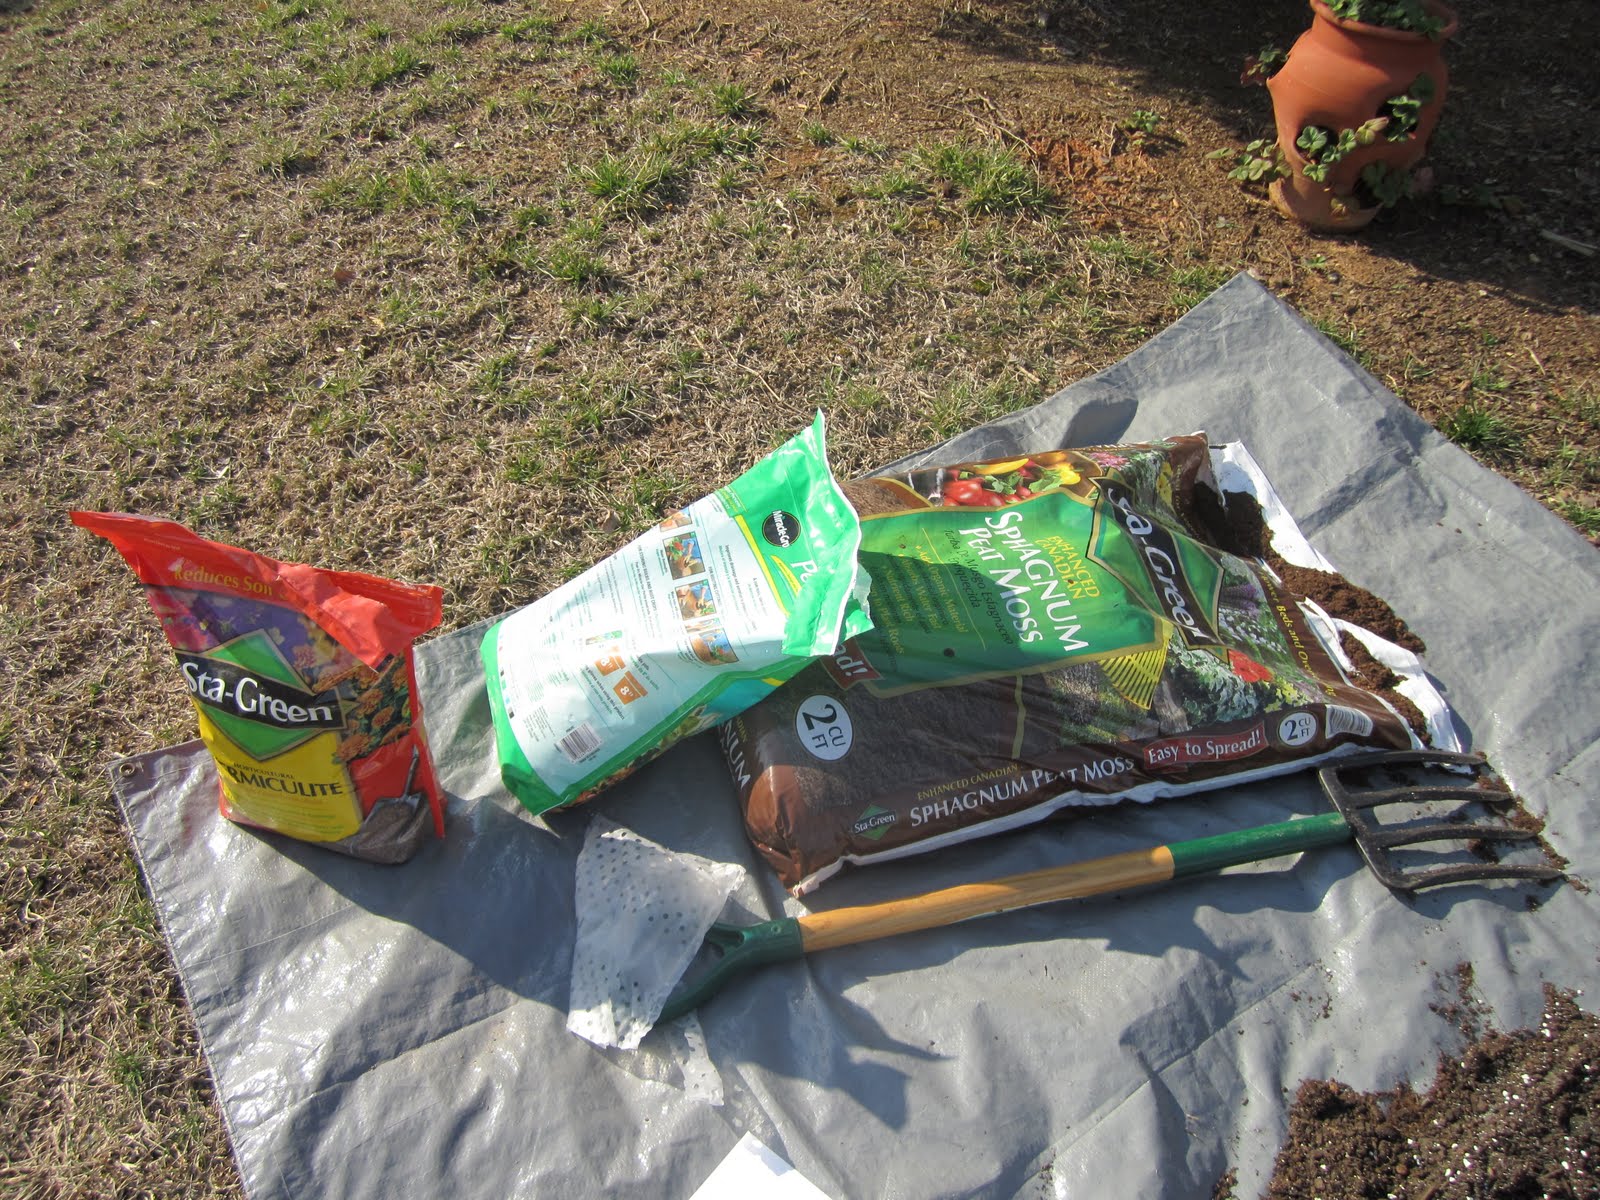 |
| the add-ins |
 |
| black gold |
My little veggies also need food in order to grow big and yummy for my kitchen. So, I've just beefed up the garden soil with a little organic compost. This is a cow's manure compost from Lowe's.
 |
| beautiful container mix |
The end result is this wonderful mixture where the perlite is obvious and it's a really rich dark brown. The sunlight makes it look a little lighter than it actually is. I'll use this same mix for all my acid-loving friends (like spinach!!) but I'll add some lime to balance it out for other uses.
2-Bin Self Watering Potato Bucket
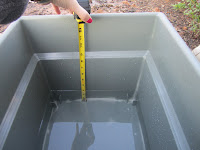
I've decided to add a new element to my gardening arsenal, self-watering containers. I think they would more accurately be called "automatic-wicking reservoir systems" but that's just me. Anyway, here is my potato bucket and my first successful prototype. The basic concept is to create a reservoir for water in the bottom; create a way for the water to wick into the soil; and include a mechanism for filling the reservoir.
In this case, I've created a 2 gallon reservoir by measuring the water level at 2 g. and cutting the fat pipe so that the top container rests at the correct height. The pipe acts as both a support for the top container and as the holder for the soil wick. I've drilled several 1/4" holes around the pipe in order to let water freely into the wick. Having a 2-gallon capacity will allow me a little more freedom with watering. I should have enough water to tide me over for a day or two during the really hot days of summer. Obviously, the bigger the reservoir, the less often I will need to water. *Note: most large vegetables will use a gallon of water each day at their peak.


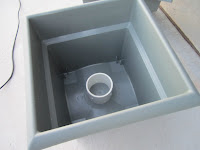
Next, I prepared the top container. The soil wick needs to touch the soil in the container, so I've cut out a large access hole in the center. Also, I've drilled several 1/4" holes to allow for air circulation from the bottom. It's not shown, but I also cut a hole for the "snorkel", or small watering pipe.
Before I can add the top container, I need to put a bit of soil in the wick.
The last step is to add the top container and I'm ready to plant! I'm using this container for potatoes so it's a little different than just filling it to the top and planting. I put a base of about 3-4" of good container soil and placed my 6 beautiful seed potatoes on top. I put just another few inches of soil on top and watered. As the potato plants grow up, I will add more soil ("hilling" the potatoes) until the box is full.
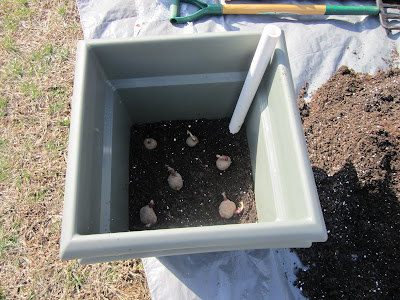
Can't wait to taste these yummy tubers :)!!
 |
| the final product |
Materials:
- two large plastic planters (~ $15 each at Lowe's)
- fat pvc pipe (~ 4" dia.)
- skinny pvc pipe (~ 2" dia.)
- Power Tools (Optional): drill, compound mitre saw, skill saw
In this case, I've created a 2 gallon reservoir by measuring the water level at 2 g. and cutting the fat pipe so that the top container rests at the correct height. The pipe acts as both a support for the top container and as the holder for the soil wick. I've drilled several 1/4" holes around the pipe in order to let water freely into the wick. Having a 2-gallon capacity will allow me a little more freedom with watering. I should have enough water to tide me over for a day or two during the really hot days of summer. Obviously, the bigger the reservoir, the less often I will need to water. *Note: most large vegetables will use a gallon of water each day at their peak.


Next, I prepared the top container. The soil wick needs to touch the soil in the container, so I've cut out a large access hole in the center. Also, I've drilled several 1/4" holes to allow for air circulation from the bottom. It's not shown, but I also cut a hole for the "snorkel", or small watering pipe.
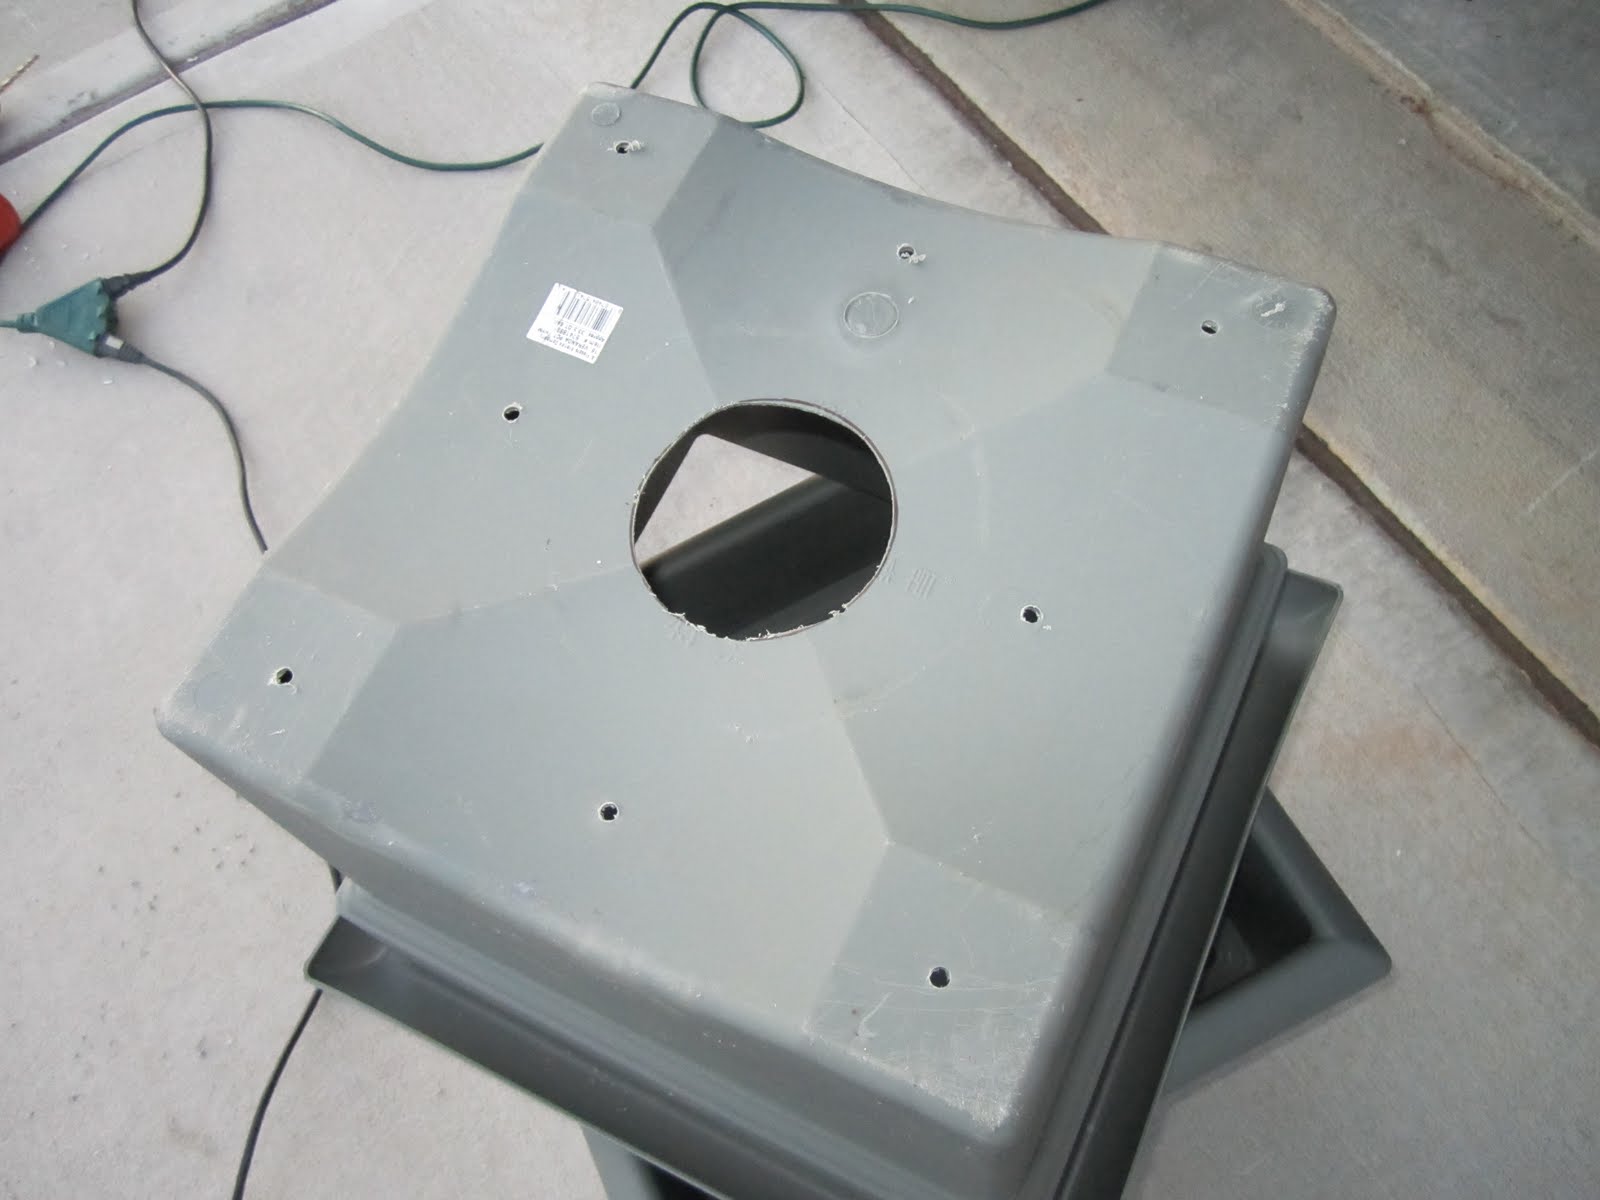 |
| bottom view of the top container |
 |
| soil wick before the top container is put in place. |
The last step is to add the top container and I'm ready to plant! I'm using this container for potatoes so it's a little different than just filling it to the top and planting. I put a base of about 3-4" of good container soil and placed my 6 beautiful seed potatoes on top. I put just another few inches of soil on top and watered. As the potato plants grow up, I will add more soil ("hilling" the potatoes) until the box is full.

Can't wait to taste these yummy tubers :)!!
Subscribe to:
Posts (Atom)